
Congratulations, you officially have your date and venue booked, and are ready to start the fun process of planning your wedding details! Some may not think of a venue layout as a wedding design element but, a customizable layout can allow you to add a personal touch to your big day and enhance your guest’s overall experience!
Whether you’re planning a wedding, a corporate conference, or a social gathering, the arrangement of tables can play a pivotal role in creating your event’s ambiance and ensuring the comfort of your guests. Sitting at the tables during an event is where connections are made, conversations flow, and memories are formed.
This blog will cover the art of designing your venue layout like a pro. Explore key considerations you may not have thought about, and discover some of our expert tips to help you transform our venue’s space. While this information is going to lean pretty specific to the Pines, if you are a bride, groom, or client working with another venue, make sure to chat with them and see if these tips, tricks, and tools can be used to transfer their space as well.
Before we get started, this is a lot of information to process but our team is always happy to help and we’d love to go through these steps together! Unlimited consultations with our Client Relations Managers areis included in all wedding packages, and we’d love to set up a time to help turn your vision into reality!
Let’s start with some FAQs about layouts to get your mind thinking about some elements to consider;
How many people can sit around the tables at the Pines?
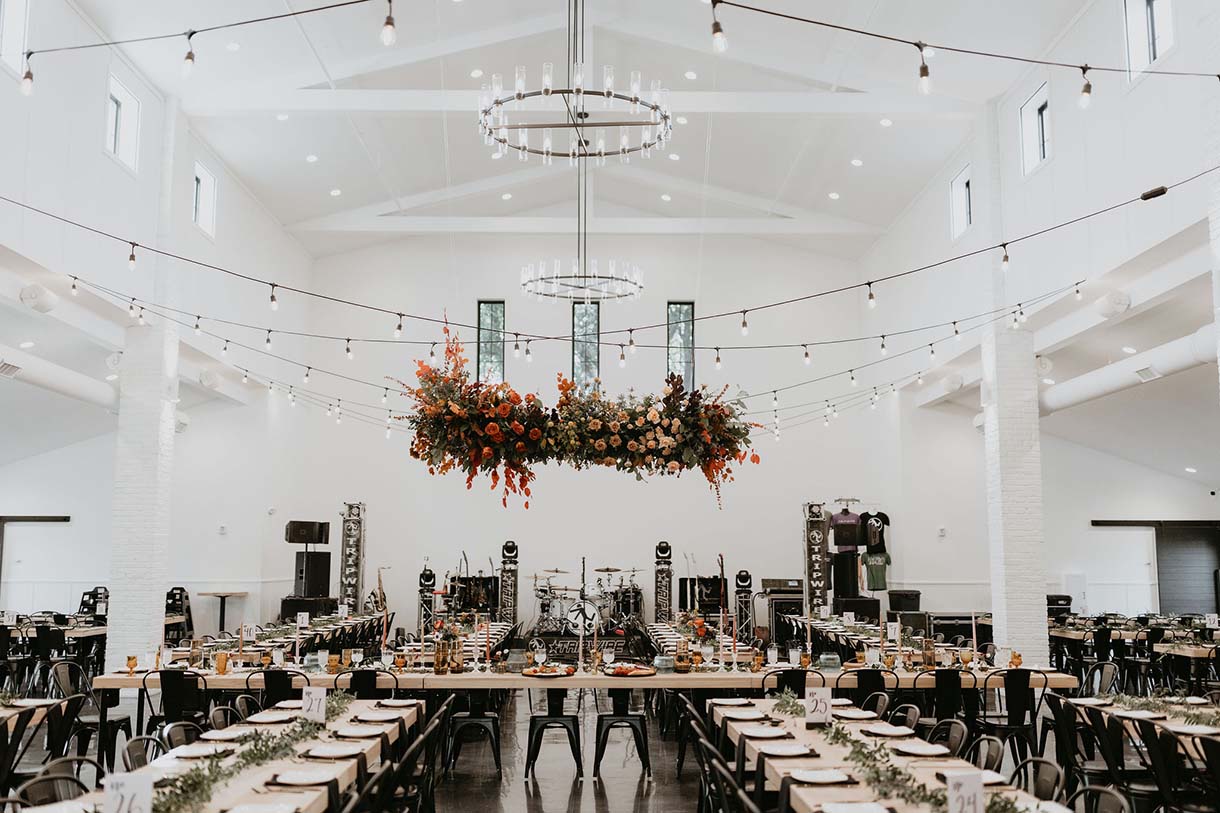
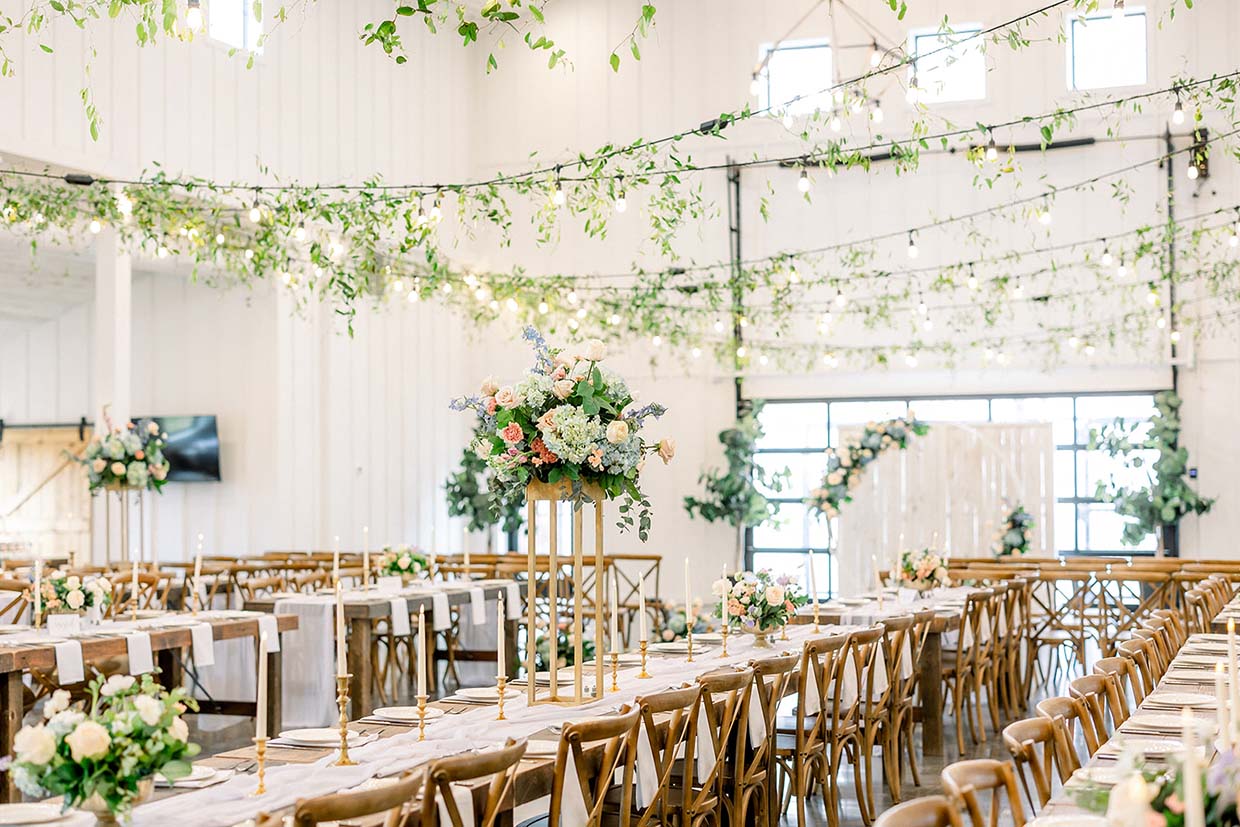
To keep things as simple as possible, all tables at the Pines were specifically curated or designed to ensure that 8 people can comfortably sit together. Whether you are utilizing our custom wooden Grain Designs farm tables, or one of our plastic round tables, each table will comfortably seat the same amount of people. Having this consistency can help with seating chart design, estimated table usage (divide your guest count by 8), and decor planning!
What are the dimensions for the tables at the Pines?
PINES WHITE
Grain Designs Wooden Tables – 50 Available (96″ x 36″ x 30″ high)
Sweet Heart Table – 2 Available (36″ x 48″ x 30″ high)
Plastic Round Guest Tables – 10 Available (60″ diameter x 30″ high) – linens not provided.
PINES BLACK
Grain Designs Wooden Tables – 45 Available (92″ x 32″ x 30.5″ high)
Sweetheart Table – 1 Available (45″ x 32″ x 30.5″ high)
Plastic Round Guest Tables – 10 Available (60″ diameter x 30″ high) – linens not provided.
Should you have a seating chart? Are there specific things to consider or do if you do or don’t create a seating chart?
Whether or not to have a seating chart at your wedding is a decision that can depend on a few factors; the size of your guest list, the style of your wedding, and your personal preference. We can go on and on about seating charts (keep an eye out for a future blog about this), but we always recommend you consider a few things before making that decision.
Having a seating chart;
Not having a seating chart;
Now that you’ve thought about some key elements that could affect your venue layout and planning, let’s go step by step and plan your perfect layout!
This is your wedding, your big day, and therefore we believe in placing the table you are going to sit at first. Where do you envision you sitting to have dinner? Do you want to face your guests or be surrounded by them? How would you like to interact with your bridal party? While there is not right or wrong way to design your head table, we start with one of our four most common sets and then customize it from there.
One of the more common head table layouts for a wedding is known as ‘Traditional Front Facing’. This design can accommodate the exact size of the wedding party, plus the newlyweds. Following traditions, this head table is placed in the front of the venue, facing the guests. The newlyweds take center stage at the head table, with members of the wedding party seated on each side of them creating a visually symmetrical look.
Additionally, parents and VIP guest tables are often seated at the tables immediately in front of the head table, ensuring they have a prime view of the proceedings. To enhance the visual appearance of this table design, decorative elements can be used behind and/or in front of this head table to create a statement appeal.
A Kings Table is built to be the focal point of a wedding reception. Most commonly placed in the front of the venue with the newlyweds seated on the head of the table, facing the guests. This setup offers a great opportunity to incorporate an arch and decorative elements behind the head of the tables to enhance the visual appeal. The wedding party is often seated on either side of the King’s table, creating a sense of togetherness and can even allow for the significant others of the party to join the table.
Additionally, parents and VIP guests can have separate tables placed nearby, ensuring they are honored while still being close to the main table. The choice of a doubled or single king’s table is a matter of preference; a doubled table makes a bold statement and offers ample space for decorations and personal items, while a single table is more intimate, fostering easy communication among everyone present.
While this layout may appear reminiscent of a banquet table, the overall experience it offers is distinct and inviting. Typically, the long table takes center stage within the venue, fostering a warm and welcoming ambiance for guests. It can come in two variations; the double-wide option makes a bold statement and allows ample room for decorative elements, while the single-wide choice encourages more intimate and conversational interactions.
Positioned prominently and centrally within the venue, this table configuration can comfortably accommodate a sizable gathering, for example it could accommodate the wedding party with their plus one and/or additional family members. It exudes a family-style atmosphere, famously nestled in the heart of the room, encircled by the company of your cherished guests.
The sweetheart table is a special feature at wedding receptions, meticulously designed to provide the newlyweds with a private and intimate space to savor their first meal together as a married couple. Most often positioned at the center of the front of the venue, one of the key advantages of this design is the precious opportunity it affords the newlyweds to steal a moment of togetherness amidst the whirlwind of their big day. Couples often take the chance to personalize their sweetheart table with meaningful items like cherished photos, sentimental mementos, or custom signage, making it a truly special place to celebrate their new union.
While the wedding party is typically seated nearby, they are not immediately next to the sweetheart table, allowing for flexibility in the design of the wedding party table to complement the overall arrangement of guest and VIP tables.
Now that you have created your dream head table, let’s determine where the party is going to take place. Dance floor location can play a critical role in your overall flow of your wedding reception. Many elements of your big day may take place on your dance floor; grand entrance and introductions, speeches, first dances, and more, so choosing the right location for you is the next step in designing your venue layout.
After dinner is served, the Pines team will relocate your head tables to the side of the venue and create space in the front area for a dance floor. This arrangement offers the newlyweds the option of a traditional head table while taking advantage of the front pre-set layout, ensuring that the social hour near the bar can be enjoyed throughout the entire evening.
Center set dance floors create a sense of togetherness, with special elements of your wedding occurring in the center, surrounded by your family, friends, and guests. While this layout may not be suitable for guest counts exceeding 250, it offers a distinctive choice for couples seeking an elevated wedding dance experience, where they are truly at the center of focus.
The third step in designing your wedding venue layout is strategically placing your guest tables. Once you’ve finalized your head table design and chosen your ideal dance floor locations, it’s time to focus on arranging the seating for your guests. This step is vital because it not only determines the flow and aesthetics of your venue but also influences the overall guest experience.
To start, consider the shape of the venue. Pines White is longer and slightly narrower which can accommodate more guest tables in the middle section of the venue versus Pines Black, which is shorter and wider, accommodating more guests along the exterior. Whether you opt to incorporate a few round tables or stick with the wooden farm tables, make sure there is ample space between the rows.
Additionally, take into account any specific seating arrangements or preferences, such as placing the appropriate number of reserved family tables near the newlyweds. Pay attention to factors like the proximity of guest tables to the dance floor and the head table, ensuring that everyone has a clear view of the central events. By thoughtfully placing your guest tables, you create a welcoming and harmonious ambiance that enhances the overall wedding experience for your wedding, and don’t worry, our team always ensures that the placement of tables works well for the overall flow for the wedding and guests.
The final step in creating a well-thought-out wedding venue layout involves considering all the auxiliary items and decorative elements. These additional elements include drink walls, dessert tables, appetizer stations, a Photo Booth, Alpha-lit letters, large structural decor, a kid’s corner or table, and soft seating sections. Integrating these elements seamlessly into your layout can elevate the ambiance and create memorable focal points for your guests.
Start by identifying the key areas where these items will be placed within your venue. For example, a stylish drink wall could be strategically positioned near where guests are entering the reception space after the ceremony. A dedicated Photo Booth corner can provide an entertaining space for guests to capture fun memories, while alpha-lit letters or large structural decor pieces can be positioned strategically to create striking visual focal points. Consider designating a kid’s corner or table for any special activities or favors for your guests.
By carefully planning the placement of these auxiliary items and decorative elements, you can not only enhance the overall aesthetics of your wedding but also ensure that they seamlessly integrate with the main layout, creating a harmonious and memorable atmosphere for your special day.
"*" indicates required fields
The Pines Weddings & Events | Fargo ND | Client Planning Resources | Planning Tools | Pines Clients | Venue Layout Inspiratoin